
KTM SuperDuke Coolant Flush and Change
After friday’s wet ride, yesterday the sun finally came out so I decided it would be a good opportunity to wash the SDuke!
Yes…my decision making hability has been questioned before….
Well washing is not a fun task, but one that has to be done, and so it was.
Halfway trough the process I noticed there was a white/grey “sandy” residue on the bottom of the coolant overflow reservoir.
I had read about the problems in the water pump seals caused by sand left from the casting process of the engine. By now I would expect this problem to have been addressed and thought the coolant circuit had been flushed on the previous coolant change (done by the previous owner…). Well it seems that If they did change the coolant they didn’t flush the circuit properly.
The SDuke is due to go for the 15.000km service this week. But because this service is already going to be expensive (Valve Clearence Adjustment) I decided to give it a go at changing the coolant myself and save a few Euros.
Started off by reading the procedure on the Owners Manual, very easy… if you can find a way to lift the front of the bike 50cm in the air (which I can’t with the means I have at home) and it also doesn’t address the flushing of the circuit.
After a bit of Internet searching I found this great tutorial: Replacing Hoses and Coolant on the Super Duke I opted not to change the hoses as they seem to be ok so I don’t see any reason to spend more money.
My procedure was a little different and although I’m no pro at mechanics I’ll try and give you some tips on how I did it, focusing on the parts not covered by the tutorial on the link above.
With a cold engine and the bike on the padock stand I removed the radiator cap to check the level, it was fine but there was some residue in the cap as well.
I then removed the two side panels from the front fairing to better access the radiator and the overflow reservoir and proceeded to draining the circuit by removing the drain bolt on the water pump (it is the one in the midle on the lower side of the water pump).
If you’re doing this get a container to catch the draining coolant (be careful it’s slippery) put the radiator cap back on and remove the drain bolt, as soon as you remove the radiator cap again the coolant will start pissing from the engine, at first it will land about 40cm from the bike, so be sure to properly place the container.

After a few minutes of draining it stopped driping coolant so I got a garden hose a inserted it in the radiator opening the tap to let water flow trough the circuit and flush all the coolant and debris. Be careful if you’re doing this, don’t use a pressure hose or to much water pressure as it could damage the radiator fins.
Next it was time to drain the overflow reservoir, now this requires the fuel tank to be lifted up, which on the SuperDuke ir quite easy to do. The tank is held in place by one bolt on the front (near the handlebars triple clamp) and two bolts on the back, where the seat meets the tank. Just remove the seat and the front bolt on the tank. Don’t remove the two bolts on the back as this hold the tank hinges. Disconect the tank overflow hose, on the front lower left side of the tank (near the top of the radiator), and just lift the tank (make sure there isn’t much fuel in it and do it slowly to see if nothing is leaking).

Get someone to hold the tank up and remove the two screws that hold the overflow reservoir in place, then remove it gently because there is a hose connect to it on the inner side, remove the clamp and the hose to allow for the reservoir to come out of place, you can leave the hose that connects to the top of the radiator in place. You can now lower the fuel tank again.

At this point I drained the overflow reservoir and using the hose washed thoroughly to remove all the deposits.

This is what had built up inside the reservoir.
Then it was just a matter of lifting the fuel tank again, getting everything connected, the overflow reservoir back in place and begin to drain the remaining water inside the circuit by rocking the bike from side to side and leaning it to the right. (Again, if you do his be careful and get help, the SDuke is not exactly light).
Most of the procedure from this point on was similar to the one described HERE, but because it is an absolute pain to get rid of all the air in the system I opted not to make the procedure first with water and then with coolant.
After removing as much of the tap water from the circuit as possible, I flushed the rest with distilled water and again drained as much of the distilled water as possible. Then started filling the circuit with coolant until all the remaining distilled water came out of the drain bolt on the water pump and the coolant coming out was the same colour as the one going in, at this point i just put the drain bolt back on and filled the system completeley. rocking the bike side to side to get the air out and adding more coolant as the air bubbles came out.
From here on I followed the same steps as Helipos, Here keeping a close eye on the engine temperature and feeling the temperature on the radiator rising (indicating the coolant is flowing and is not blocked by an air bubble. After about a minute (maybe less) of the engine working and before it got hot I removed the radiator cap to refill (be careful, make sure it is not hot or it could burn you!) the level on the radiator had gone down quite a bit.
Again radiator cap on and the engine working, allowed it to get all the way up the temperature range until the fan started working (it’s not supposed to get to max temperature, the fan should start at about 2 bars below max and the temperature then lowers after a few seconds).
Allowed the engine to cool down and took the radiator cap back off to refill, then lifted the fuel tank again and drained the overflow reservoir as it had collected a lot of distilled water/coolant mix (it was light blue colored instead of bright blue) and refilled it with coolant. Reconected everything, put the fuel tank bolt back on, conected the fuel drain hose and double checked everything.
I the went for a short ride, revving the bike hard (after it the engine was up to temperature) to get the coolant to flow and dislodge any air pockets, on return allowed for the bike to cool down before taking the radiator cap again to check the level and topped it up.
And it’s done!
Now I still have to check on the next rides if the coolant level inside the radiator doesn’t drop, and that there is no more residue collecting on the overflow reservoir. I’m also going to have a look at the oil filter on the 15.000km service, for any foaming indicating that the water pump could be leaking coolant into the oil.
This is not meant to be an expert tutorial or anything like it, I did this at my own risk on my own bike, If you decide to do it too, it at your own risk. If you can, get a professional to do it. This in only meant to give you a short description on how I did it to MY bike.
Be careful when following this procedure, especially if you live in a cold country. KTM recomends a 50% Coollant + 50% Distilled Water mix with a MINIMUM freezing protection of -26ºC, where I live you can’t even find that kind of coolant, the lowest temperatures are around -1ºC or -2ªC so all vehicles use -5ºC Coolant. I used the only coolant for temperatures lower the -5ºC I could find: Redex -11ºC Extreme Temperatures Coolant which can be used directly or diluted. If you read the text above you’ll notice I used it straight from the bottle, this was to account for some dilution that may happen from some distilled water that might still be in the circuit. Because the temperatures here very rarely below 0ºC I’m not worried about the antifreeze protection not being exactly -11ºC, but if you live in a could area make sure you’re coolant is concentrated enough to protect your bike.
KTM SUPERDUKE 990 BY ANALOG MOTORCYCLES

This is what happens when a Cafe Racer Builder mods a modern Super Duke to be his daily ride.
Mechanical mods include a full Termignoni exhaust, a Moto Hooligan air box, smaller secondary butterflies, SAS bypass and 520 chain kit. On the bodywork side of things, there is a beautiful custom paint job, lots of powdercoating and bar end mirrors.
I think it’s as beautiful as it is simple, absolutely love it! What do you think?
Check out other work by Analog Motorcycle and the post about this bike on Silodrome. I couldn’t agree more with the author of the text, the Super Duke and the Speed Triple where exactly the bikes that I fell in love with since the first time I rode them and when it came to buy a second bike, the Duke won!


KTM confirmed the new 185bhp Super Duke for October!

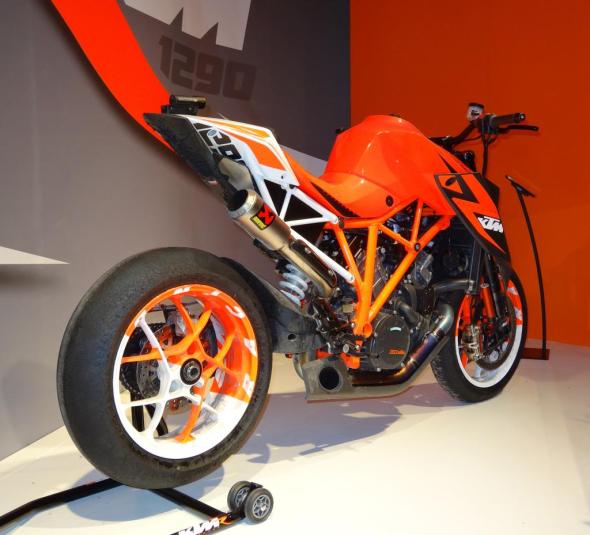
Quick Update:
According to MCN KTM has confirmed that the brand new 185bhp Super Duke 1290 based on the prototype unveiled a couple of months ago will be launched in October 2013.
Can’t wait for a Test-Ride!!
Initiate countdown – 86 days to go!

Just signed up for the next Advanced Riding Course in AIA Portimão that will take place in the 25th May 2013, a looong 0,24 years or 2 months and 27 days or 86 days of waiting until I can get the KTM on track again!
Can’t wait! In the mean time still have to buy a new rear Dunlop Sportsmart the one fitted to the bike is not looking good after only 3000km done the bike also has to have the 15.000km service (with valve clearence adjustment) done. Maybe it’s not so bad I still have almost 3 months to get this done… the “tim€” (in UK units Tim£) is not abundant…
It’s almost time!

KTM 990 Superduke @ Autódromo de Portimão (AIA) soon… really soon! 😀
Can’t wait!!
P.S – Check out www.tugabikers.com for info about Portuguese Superbike Championship and other track related events
CoyoteMoto – where not to buy online
A couple of weeks ago I ordered a full set of crash bobbins for the SuperDuke at Coyotemoto.com (check out this post).
I had contacted Coyotemoto a few months back trough their eBay store and gotten a quick answer so I thought they would be a good option, the prices helped the decision.
Well, I had read a few complaints online about their service (slow delivery, etc) but thought it was just one or two isolated cases. It seems it wasn’t, their service is second to none in terms of crappyness!
So this is what happened, bought and payed the full set of bobbins with Paypa (about 170€). Upon payment received and automatic email indicating my order number, and after that…nothing else!
I emailed them the next day asking about the estimated delivery date: no awnser. Tried emailing them again a few days later trough their online form: no awnser. Again a few days later tried calling them on the phone: no one answered.
Still, I persisted and sent another email: you can guess the outcome… No awnser!
Finally lost my patience and openness a dispute on PayPal, again trying to contact CoyoteMoto, as they continued without responding I escalated the dispute to a claim and the good fellows at PayPal gave me back my money the next day!!
Thank you Paypal!!
In the meantime I’ve lost almost 3 weeks and I need a set of crash bobbins before the 21stJuly (because of the advanced riders course on track on the 28th). I’ve just ordered a new set (upper bobbins only) from Evotech. Hopefully this will go a lot better!
Of you’re in the market for a set of crash protectors for your bike, I definitely do not recommend CoyoteMoto.com,
I don’t know why they ignored all of my communications, if they went out of business, on vacations or whatever, but it is unacceptable to do this, taking your client’s money and not giving any explanation. Not cool!
Upgrades for the KTM SuperDuke
The Advanced Riding Course at AIA (Portimão) is litle more than a month away, so it’s time to get Karen some upgrades and crash protection (wich hopefully won’t be needed).
To help with the wind blast, I ordered KTMs Touring windshield, the standard wind deflector looks good but it’s useless at speeds above 170km/h, so hopefully this will help a litle.
The Touring Windshield costed 59€ and I’ve already fitted it, altough I haven’t had time to ride the bike to try it out. As soon as I do, I’ll update this post with a my first impressions.

The Standard and Touring Windshield side by side

Before and After
Also from KTMs Power Parts Catalogue came the passenger footpeg sliders, two small pieces of TPU plastic that costed 18,45€ and are suposed to minimize the damage to the rear of the bike in case of a spill. Fiting them required the use of a hammer to remove the pin that holds the footpeg. Even with the help of WD40, the pins was insisting it didn’t want to leave it’s place, so I had to hammer it out.

The Pin, locking ring and side plates of the foot peg.

The slider fits to the bottom of the footpeg

The footpeg retains full functionality.
I’ve also ordered a full set of crash bobbins (front axle, rear axle, Upper front frame sliders and lower front frame sliders) from Coyote Moto, wich costed around 170€. Still waiting for them to arrive, when they do, I’ll post the fitting process.
The new girl’s going to give the ZZR a run for it’s money
 Yes,
Yes,
I now the blog title is ZZR1400 Touring, but I must say my new KTM Superduke is giving the old girl a run for it’s money.
It’s just so much better as a fun bike! The WP suspension in sport setting may be hard as a rock but it just works so much better than the ZZR’s.
Granted the ZZR is a much better allround bike and that’s why I’m keeping both, the Sduke is uncomfortable two up, the wind blast is tiresome and I do miss the heated grips and the howl of a proper 4 cylinder.
But it’s when comparing both that I realised two things, first of all just how amazingly powerful the ZZR is! I’ve been riding CBR100XX, K1200S and ZZR1400 for the last five years and it’s easy to forget how powerful this things are, they’re in a whole other league from most bikes. Secondly how much better the ZZR suspension could be.
When I upgraded from my 80.000km ’97 CBR1100XX I found the ZZR suspension to be great in comparison, and although many people complained about the poor quality of the Kawasaki suspension, I never really got it, well until now!
Ok, I’m not saying the ZZR suspension is hopeless, far from that, I actually thing it’s pretty much OK for 95% of the riding I do, but it could be a LOT better and hopefully that will be one of the real improvements in the 2012 bike…
Meet Karen
It’s official, I’ve just gone for the other “K” and bought a 2007 KTM 990 Superduke named Karen.
So now it’s Muni and Karen, the Kawasaki an the KTM 😀 😀 😀
Going to pick it up tomorrow, for now the only photo I have is this:

Really Want One!
Since I first rode a KTM 990 superduke I’ve been in love with this litle orange hooligan. It’s the must fun bike I’ve ever ridden, and right now I’m starting to think it would make a perfect house mate to the ZZR.
Maybe, just maybe…


